
Expense Tracking Template: Better Control of Your Money – Free

You go looking for a free expense tracking template, download the first decent-looking one, open it up, and find… a personal budget.
Rows for groceries. A gym membership. “Eating out.” Nowhere to tag an expense to a client, no way to flag what’s billable, and none of the categories that actually appear on a freelancer’s tax return.
It’s a different job. You need business separated from personal, every expense tagged to a client, billable costs split from overhead, and the whole lot rolling up into tax categories at year-end. A budget template does none of that.
So here’s one built for freelancers instead. It totals your spending by category and by billable status automatically, so you can see what each client cost you and what you can claim.
Grab it below — along with what to track and why, and, if you’d rather build your own from scratch, the step-by-step with the exact formulas.
Quick Takeaways
- Our free Google Sheets template auto-totals your expenses by category and by billable vs overhead — you just fill in the rows.
- It’s built for freelancers: client and billable columns let you see what each client actually cost and separate project costs from overhead.
- The columns that matter most are date, vendor, category, and amount — plus client, billable, payment method, and notes.
- Building your own is quick: a table, drop-downs for the categories, and SUMIF formulas for the totals.
- Categorize to tax categories as you go, and tax time becomes a straight export instead of a re-sort.
Get the free expense tracking template

Download the template, open it in Google Sheets with File ▸ Make a copy, and log each expense — pick the category, client, and billable status from the drop-downs, and the summary panel totals everything for you, by category and by billable status.
The only thing you ever type is plain information. The math takes care of itself.
Here’s the whole routine:
- Make a copy. Open the file in Google Sheets and choose File ▸ Make a copy, so you’ve got your own editable version.
- Add a row per expense. Enter the date, the vendor, and the amount as you spend.
- Pick from the drop-downs. Choose the category, the client (or “overhead”), the billable status, and how you paid — the drop-downs keep everything consistent so the totals stay accurate.
- Watch the summary update. The panel on the right shows your total spend, the billable-versus-overhead split, and a breakdown by category, all recalculated as you type.
- Start fresh each year. Duplicate the tab or the file for a new tax year so each year’s records stay separate.
- Export when needed. File ▸ Download ▸ PDF gives you a clean copy to hand your accountant.
The template already includes the category drop-down, the client and billable columns, an auto grand total, a billable split, a per-category breakdown, and a couple of worked example rows so you can see how it fits together.
What to Include in an Expense Tracking Template
Every expense needs four essentials. The date, the vendor, a category, and the amount — which is close to what the IRS expects a supporting document to show: the payee, the amount paid, proof of payment, the date incurred, and what it was for.
For freelancers, it’s worth adding a client, a billable flag, a payment method, and a notes field so each expense is ready for both tax and client billing.
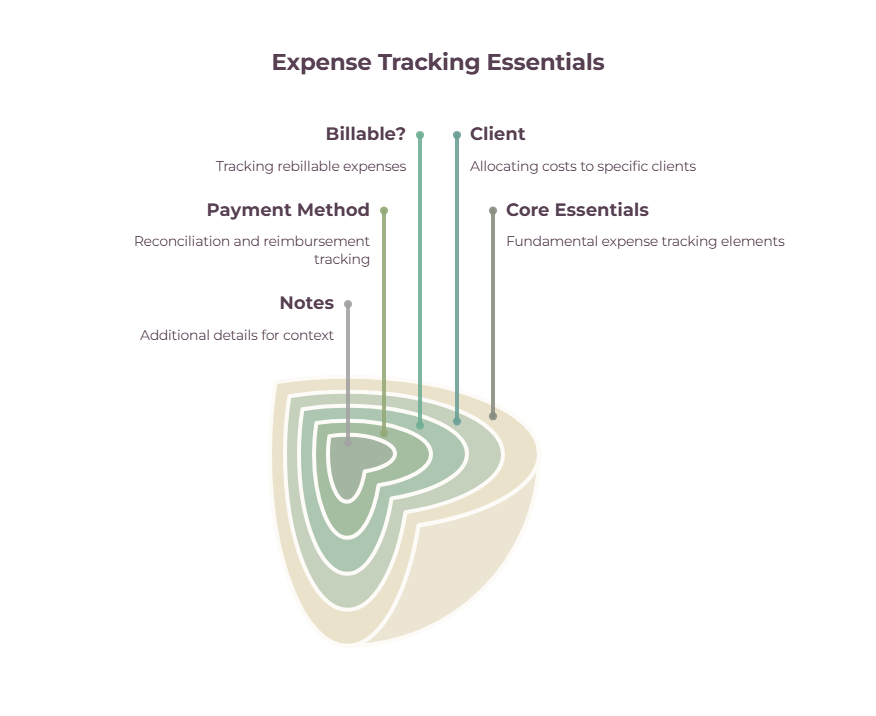
More columns than that just add friction; fewer, and you lose the answers you actually want.
Here’s what each column earns its place for:
- Date — when it happened, for ordering and for the right tax year.
- Vendor / description — what it was, so a line still makes sense in twelve months.
- Category — the tax bucket it belongs to (this is what makes tax time easy). The template’s buckets follow the expense lines on Schedule C, the form US sole proprietors file.
- Amount — the number everything totals from.
- Client — which client the cost relates to, so you can see what each one actually cost you (or “overhead” for general business costs).
- Billable? — whether you’ll rebill it to the client or absorb it, so nothing rebillable slips through.
- Payment method — handy for reconciling against the right account, and for spotting personal-card spending to reimburse.
- Notes — anything you’ll want to remember, like “rebilled on invoice #12.”
The client and billable columns are the freelancer-specific part, and they’re what turn a plain spreadsheet into a tool that answers real questions: was that client profitable after costs, and what am I owed back?
How to build an expense tracking template in Google Sheets

If you’re looking for more flexibility with your own template design, there are some fundamentals to cover which you can then build on.
Simply make a table with these columns, add drop-downs for category, client, and billable so your entries stay consistent, then use SUMIF formulas to total each category and SUM for the grand total — and format the amount column as currency.
If you’d rather build your own than use the template, it takes about ten minutes.
- Add the header row. Across the top: Date, Description/Vendor, Category, Client, Billable?, Payment method, Amount, Notes.
- Create the drop-downs. Select the Category column, go to Data ▸ Data validation, choose “Dropdown,” and enter your categories. Do the same for Client and for Billable (Yes/No). Drop-downs stop typos — and a typo like “Traveling” vs “Travel” quietly breaks your category totals.
- Add the grand total. In your summary area, use =SUM(H6:H46) (adjust to your amount column and rows) for total spend.
- Total each category. Use =SUMIF(D6:D46, “Travel”, H6:H46) — it scans the Category column for “Travel” and adds up the matching amounts. Repeat with one line per category (or reference a cell holding the category name).
- Split billable from overhead. =SUMIF(F6:F46, “Yes”, H6:H46) totals everything marked billable; swap “Yes” for “No” for overhead.
- Format and freeze. Select the amount cells and format them as currency, then View ▸ Freeze the header row so it stays put as the list grows.
That’s the whole engine: type plain information into the rows, and the SUMIF formulas keep your category and billable totals up to date on their own.
Use categories that match your tax return

Categories are crucial for organization and are best set up to match deductible buckets. Examples could include software and subscriptions, home office, equipment, travel, marketing, professional fees, bank and platform fees.
Do this right and your totals map straight onto your tax return with no re-sorting at year-end. Categorizing as you go is the single thing that turns tax time from a weekend into a five-minute export.
The expense tracking template comes with those common freelancer buckets already in the drop-down, but adjust them to fit your work and your country’s rules.
The test for whether something’s deductible is whether it’s ordinary and necessary for your business, and anything used for both business and personal life usually needs splitting to the business share.
For what fits where, see our guide to freelance tax deductions, and for the bigger picture, how to track expenses. (This is general guidance, not tax advice — check specifics with an accountant.)
Template or software — and Sheets or Excel?
A spreadsheet is free and perfect while your expenses are simple; dedicated software earns its place once auto-importing from your bank saves more time than it costs.
And the template works in both Google Sheets and Excel — Sheets just adds cloud backup and access from any device. Start with the template, and upgrade only when you feel the friction.
The dividing line is typically volume.
If you’re logging a handful of expenses a week, a template you fill in during a Friday review is genuinely all you need, and it costs nothing.
Once you’re handling enough transactions that typing them in feels like a chore, expense software that connects to your bank and categorizes automatically starts to pay for itself — our roundup of expense tracking software covers the options, several of them free.
Expense tracking software handles the spending side; accounting software for freelancers goes further with invoicing, reconciliation, income tracking, and financial reports.
As for Sheets versus Excel, the template behaves the same in both; Google Sheets just gives you cloud storage, real-time access from your phone, and no software to install, which is why it’s the default here.
Prefer Excel?
File ▸ Download ▸ Open in Microsoft Excel, and it’s yours.
Wrapping up
You don’t need accounting software to stay on top of your expenses.
A simple template that totals by category and separates billable costs from overhead does the job for free — and the client and billable columns give you answers a generic budget sheet never will.
Grab the template above, make a copy, and log this week’s expenses in a couple of minutes. Future-you, at tax time, will be glad you did.
Frequently Asked Questions
How do I make an expense tracker in Google Sheets?
Create a table with columns for date, vendor, category, client, billable, payment method, amount, and notes.
Add drop-downs for category and billable via Data ▸ Data validation, then use =SUM for the grand total and =SUMIF to total each category.
Format the amount column as currency, and you’ve got a working tracker — or just copy the free template above.
What columns should an expense tracker have?
At minimum: date, vendor, category, and amount.
For freelancers, it’s worth adding a client column, a billable flag, a payment method, and a notes field, so each expense is ready for both your tax return and any client rebilling.
More than that tends to add friction without adding useful answers.
Is there a free expense tracking template?
Yes — the Google Sheets template above is free. Open it, choose File ▸ Make a copy, and start logging; it auto-totals your expenses by category and by billable status. It works in Excel too if you download it in that format.
How do I total expenses by category in a spreadsheet?
Use the SUMIF formula. For example, =SUMIF(D6:D46, “Travel”, H6:H46) scans your Category column for “Travel” and adds up the matching amounts from your Amount column.
Add one line per category, and use drop-downs for the category names so a typo can’t break the totals.
How do I track billable vs non-billable expenses?
Add a “Billable?” column with a Yes/No drop-down, and mark each expense as you log it. Then total each with SUMIF — =SUMIF(F6:F46, “Yes”, H6:H46) for billable and “No” for overhead.
It’s the easiest way to make sure nothing you can rebill to a client slips through unclaimed.
Should I use a spreadsheet or an app?
Use a spreadsheet while your expenses are few and simple — it’s free and quick.
Move to an app or accounting software once you’re handling enough transactions that automatic bank imports and categorization save you real time.
Plenty of freelancers run on a template for years before upgrading.
Related guides: how to track expenses · expense tracking software · the best receipt scanner apps · freelance tax deductions · invoice tracker · accounting software for freelancers